Grant someone specific powers over your affairs to act on your behalf.
Updated May 24, 2024
Written by Ioana Gagiuc | Reviewed by Brooke Davis
A limited power of attorney is a legal document that gives someone (the agent) the authority to temporarily act on your behalf (the principal) in a specific situation of legal, personal, or financial nature.
The principal must carefully consider the specific tasks or decisions they wish to delegate and clearly define the scope and duration of their authority within the document.
The agent can only act in a restricted capacity, and you indicate in the form for a defined period. After the action has been enacted or you go past the end date, the power of attorney becomes void and has no legal effect.
The document must adhere to the signing requirements for a durable power of attorney in the principal’s corresponding state.
Both documents authorize someone you choose to handle your affairs, but the main difference is the scope of their powers:
For instance, an LPOA can allow someone to cash checks for you and open your safety deposit box, but that agent wouldn’t be authorized to withdraw money or access your finances in any other way.
A limited power of attorney gives your agent specific authority to complete certain tasks for you (such as signing a contract). Still, it doesn’t grant the agent complete authority over your affairs.
Here are some examples of circumstances in which the document may be helpful:
You may also create limited power of attorney documents for minor tasks requiring someone to oversee your property responsibly, such as driving your car cross-country or building on your land.
Using a limited power of attorney requires careful thought due to its unique nature and implications. Below are some key considerations:
Document: It gives someone the power to sign for a specific transaction. Careful attention must be paid to drafting it, ensuring it is clear, precise, and legally sound. The agent should not be authorized to sign any documents that are not listed.
Scope: Determining the extent of authority is a critical consideration. The scope should align with the specific purpose for which the form is created and safeguard the principal’s interests.
Duration: The form’s validity has a start and end date. This could be for a single transaction, a specific period (e.g., a week, a month), or until a particular event occurs. The form is only in effect for the period defined.
You can set up your limited power of attorney to end at a specific date, after a particular event, or when its specific purpose (if it’s created for a single task like selling a home) is completed. In most states, if you don’t include an end date/event, the form will last until:
The principal keeps the right to revoke or amend the document at any time as long as they are of sound mind. To do this, a revocation of power of attorney form must be created and delivered to the agent and any third parties involved.
The principal can specify an end date as an automatic cancellation trigger. This means that the agent’s powers will no longer be valid upon the selected date.
Another method for automatic revocation is when the action or responsibility outlined in the limited power of attorney form has been fulfilled. In such cases, the document will cease to be valid. For example, if they were tasked with overseeing a real estate transaction, the document is no longer in effect once completed.
Once the principal decides what specific powers to grant, they can begin completing the form. Here are the steps to follow:
While considering the appointment of an agent, also known as an attorney in fact, the principal should carefully select someone they know and trust from any of the following:
Once the agent or agents are chosen, the form should include their full name, address, and principal’s.
Additional persons can also be nominated as the principal’s successor agent(s) if the initial agent(s) are unable or unwilling to serve.
Here, the principal should leave detailed instructions for what the agent may do on their behalf. They will be limited to precisely what is written here and cannot do anything that is not listed, so all powers granted must be specified carefully.
Limitation on Agent’s Authority: This clause is included in the form and prevents agents from using the principal’s property unless allowed.
Any special instructions from the previous section should be listed here.
Unless otherwise stated in the Special Instructions section, the principal should select one checkbox to explain when the powers will take effect. This can be:
The power of attorney expires when a specific task is completed or upon the expiration date specified in the document. A non-durable power of attorney is automatically canceled if the principal becomes incapacitated.
The principal must sign the form. Depending on each state law, one or two witnesses’ signatures and/or a notary acknowledgment may be required. The notary public verifies the identity and intent of the parties involved, ensuring the document’s legality, while the witness is typically present to observe the principal’s signature.
Here is a step-by-step guide to help you set it up:
The principal must identify the reason for creating the power of attorney. Understanding the exact scope of authority to delegate is a vital first step, whether for real estate transactions, financial management, or legal matters.
Once a trustworthy and responsible individual has been selected as the attorney-in-fact, the principal can create the initial form to assign specific powers.
The principal should carefully review it to ensure it accurately reflects their intentions. If any changes are necessary, working on revisions is recommended until they are satisfied with the content.
After the limited power of attorney is signed and notarized (if applicable), the attorney-in-fact should obtain a copy, and the principal should keep one for their records.
If the form involves financial institutions or legal matters, copies to relevant third parties, such as banks or lawyers, might be required.
The principal must inform relevant parties about the existence of the form, especially those with whom the attorney-in-fact may interact.
The form should be periodically reviewed to ensure it remains up-to-date and aligned with the principal’s wishes.
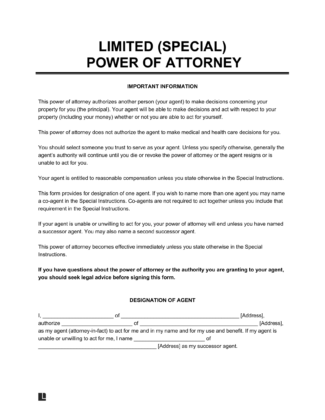
Download our limited power of attorney template below in PDF or Word format.